Creating a Storefront
Follow these steps to set up a new store in Creator Studio to sell your yearbooks.
1. Start from the Home Screen
-
From Creator Studio’s home screen, click the “Sell” tab.
-
Then, click the “New Store” button located in the lower right corner.
2. Fill in Store Details
You'll be prompted to enter the following information:
Store Name
This name will appear at the top of your store. Do not include the word “Store”—it will be automatically added.Example: If you name your store “Bulldog’s Yearbook,” it will display as “Bulldog’s Yearbook Store.”
-
School or Organization Name (optional)
By default, this matches the school name in Creator Studio. You can change it if needed. -
URL
This is your store’s unique web address. Share this link with your school and parents to allow them to access your store. -
Contact Info (optional)
Your name and email will appear in the help menu by default. Enter new contact info here to override the default. -
Passcode (optional)
Add a passcode to restrict access. Visitors will need to enter this passcode to view your store.
Click “Next” when you’re done.
3. Customize Store Appearance
Add your school branding to personalize the store:
Logo or Mascot Image
Click the grey box to upload your logo or drag the file in.Recommended size: Max 500px x 500px
-
Header Color
Click the color selector to choose a header color, or enter a custom hex value. -
Text Color
Choose a color for your store text using the selector or by entering a hex value.
Tip: Make sure your header and text colors have good contrast for readability.
Example: Use black text on light colors or white text on dark colors.
Click “Next” when finished.
4. Select Yearbooks to Sell
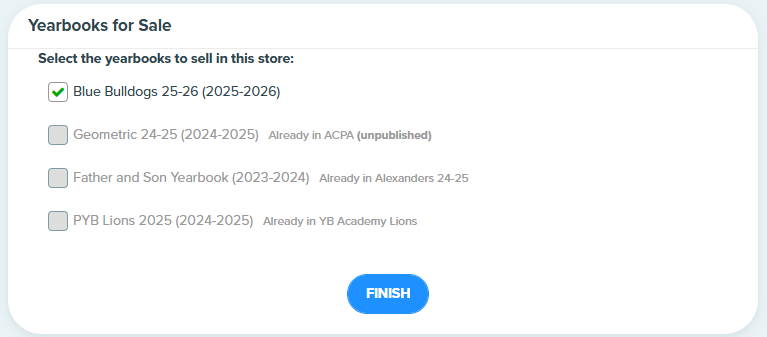
-
Find the yearbook(s) you want to include.
Check the box next to each yearbook name.
Note: If a book is already assigned to another store, it will not be available here.
5. Save Your Store

-
Click “Finish” to finish setting up your store.
✅ Next Step
To learn how to publish your yearbook so it appears in the store, see this article here.
Related Articles
Password Protected Storefront
The optional storefront password will add an additional layer of security for schools that want to ensure that only persons invited by the school can purchase a book. 1) Click on “Store Settings” next to your store name in Creator Studio. 2) In the ...Creating a PSPA Portrait CD
It is highly recommended that schools select a photographer who is familiar with and uses the PSPA format for your portraits. Doing so should provide you access to a formatted portrait CD (also called a PSPA disc) that will allow you to easily flow ...Is it possible to have the same book in different stores?
A yearbook can only be listed in one store at a time. This includes books that are still in progress, such as those available for pre-order. This limitation is important because both the store settings and the book settings—such as pricing, ...Creating and Designing an Ad Section (Advisers)
If you have Parent Ads enabled in your project, you can begin creating ad sections and placing ads throughout your yearbook. This guide will walk you through the steps for creating ad sections, enabling ad pages, and designing your ad layouts. ? ...Can the full yearbook be previewed from the storefront?
To keep the final product exciting and to respect student privacy, the full yearbook isn’t available for public viewing or preview through the online storefront. While you can see details like the cover design, price, order deadlines, and ...